Configure Microsoft Power BI in D365 BC:
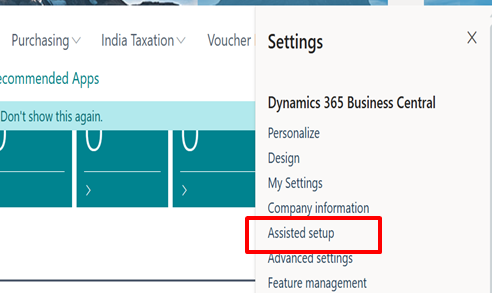
(1) In this blog, we will configure the Microsoft Power BI tool in D365 Business Central. For this, first open D365 Business Central and go to the settings, and select “Assisted Setup”, as shown.
(2) After clicking, the List opens and press “Connect To Power BI”, as shown.

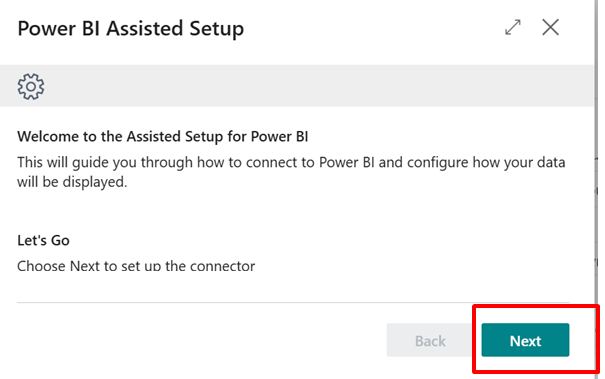
(3) After pressing, a new pop-up window opens and selects the values as per the business requirement and presses “Next”, as shown.
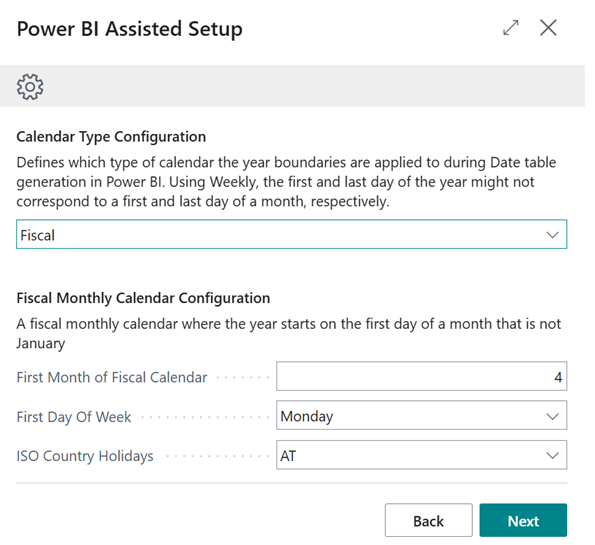
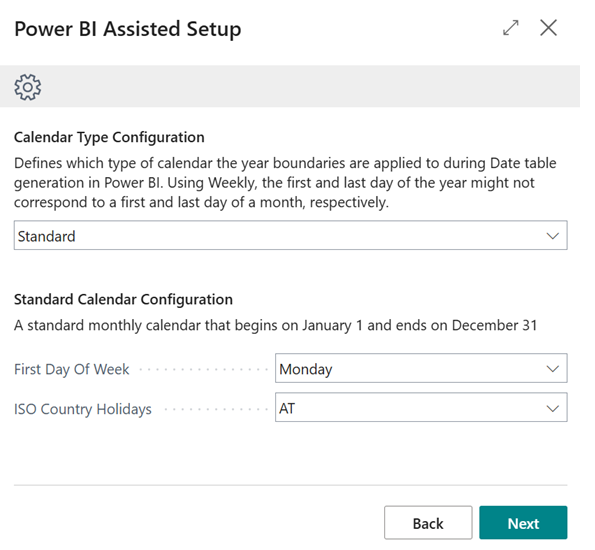
(4) Now configure the “Calendar”; there are three options, as shown.
- Fiscal: A fiscal monthly calendar where the year starts on the first day of a month that is not January.
- Standard: A standard monthly calendar that begins on January 1 and ends on December 31.
- Weekly: A fiscal weekly calendar that supports: 4-4-5, 4-5-4, or 5-4-4.
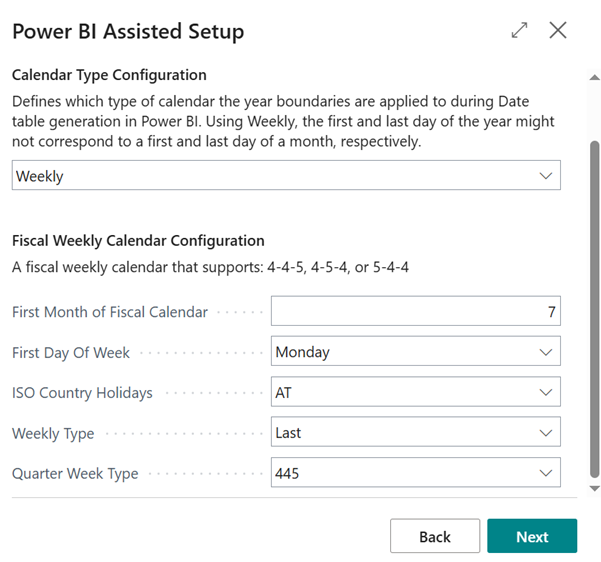
(5) As per the business need, select the desired option and Press Next. In this blog, I have selected the Fiscal option, as shown.
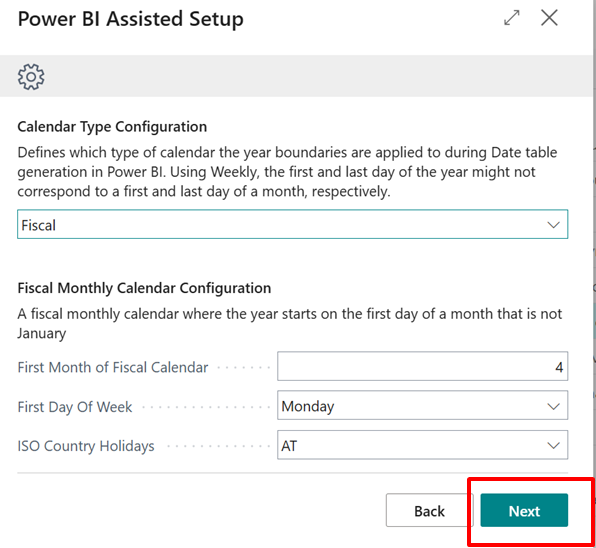
(6) After pressing, the next pop-up window opens, and enter the Time Zone and Dates comes auto, as shown.
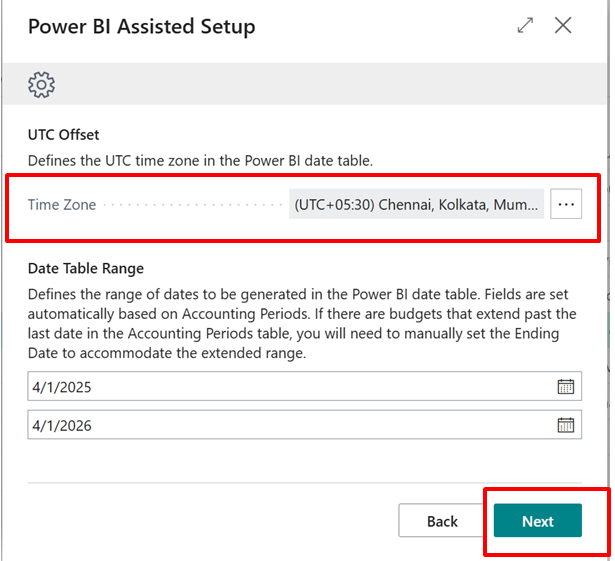
(7) Enter the Information in the Next window and press Next (changes can be made as per the need), as shown.
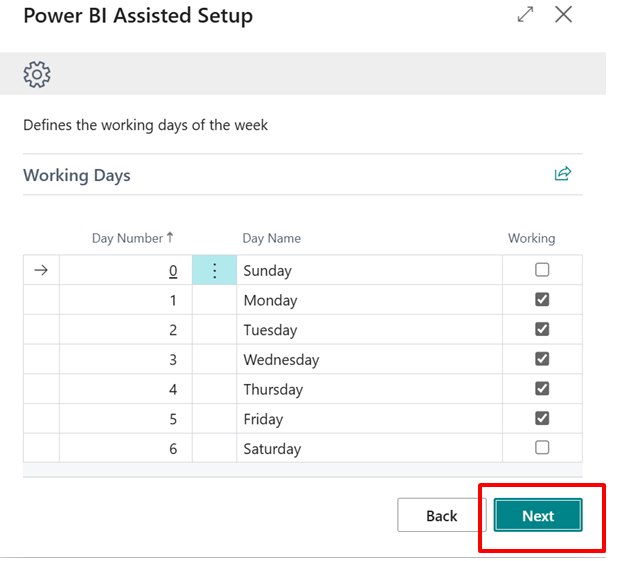
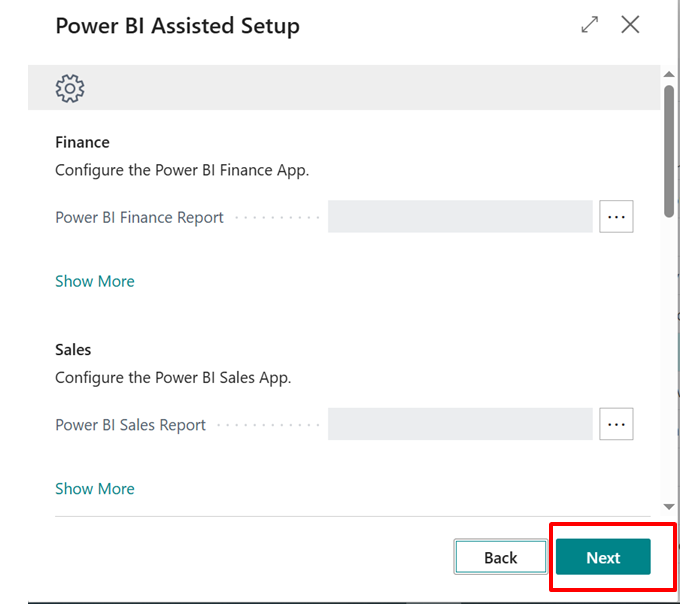
(8) After that, the next window opens. In this window, configure the apps in the blank columns. Leave the blank column and press next. As shown.
(9) Now, the Power BI setup is complete. Press Finish, as shown.
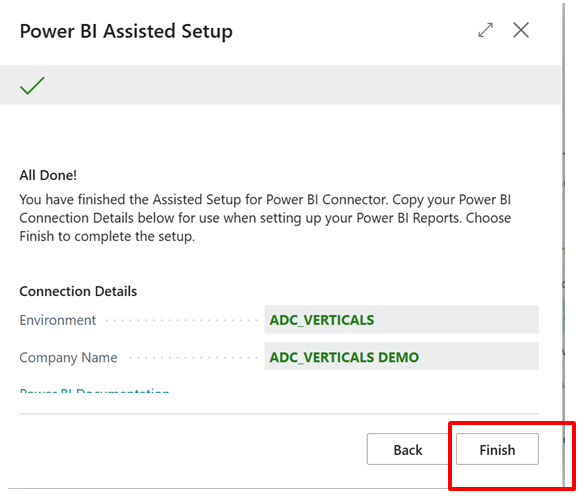
(10) In this way, Power BI is set up and configured in Business Central. Now, in the next Blog, we will set up Standard Power BI Reports in the Business Central Dashboard. Without doing the above setup, the system will not allow calling a Power BI report in D365 BC.


