Integrate Power App with D365 BC Using Dataverse:
(1) In this blog, we will get to know about the steps for integrating the Power App with D365 BC using Dataverse.
(2) For this we have to first setup Dataverse in Business Central. Note: This step is mandatory, otherwise, Business Central Tables not visible in Power App.
(3) Dataverse is just like bridge between the Power Pages and D365 Business Central, as shown.

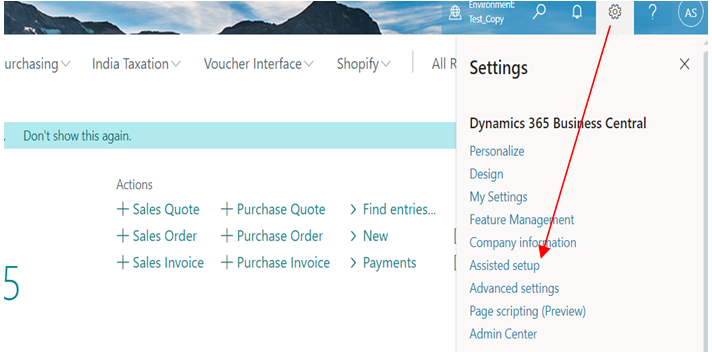
(4) Now, Sign the D365 Business Central and go to the Settings icon > Assisted setup , as shown.

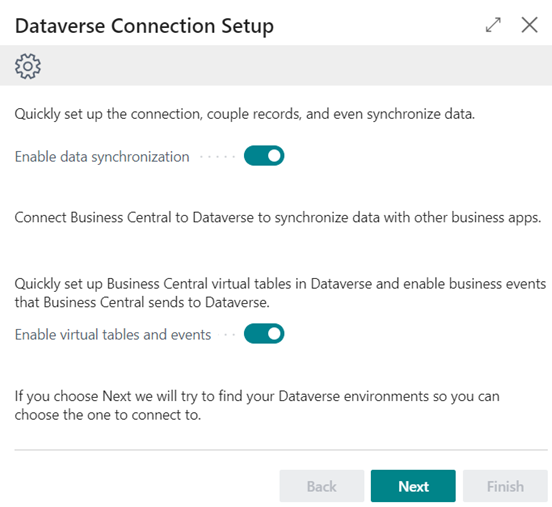
(5) After that, Set up a connection to Dataverse, to open the Dataverse Connection Setup assisted setup guide, as below:
(a) Assisted Setup List opens and select the “Set up a connection to Dataverse, as shown.

(b) Now setup the connection as shown.
- Press Next.

- Accept the terms and conditions and press Next.

- Select the desired option. In this step I preferred By default value and press “Ok”.

(6) After that, “Dataverse User Environment” and press Ok, as shown.

(7) Now, sign in as an administrator user, and then select Next, as shown.

(8) Follow the by default values, press Next, as shown.

(9) Press Next, as shown.

(10) While using the below step, first install the Business Central Virtual Table app, otherwise, system shown the below pop message, as shown.

(11) Click on the “Install Business Central Virtual Table app” for installation, as shown.

(12) After that, select the environment and accept the terms and conditions & press finish, as shown.

(13) Now Business Central Virtual Entity installing, as shown.

(14) After sometime, Business central Virtual Entity status installed, as shown.

(15) Now Press Finish, as shown.

(16) Dataverse connection has been established as shown.


