Table of Contents
Report Creation In Microsoft Dynamics 365 BC
STEP-01:
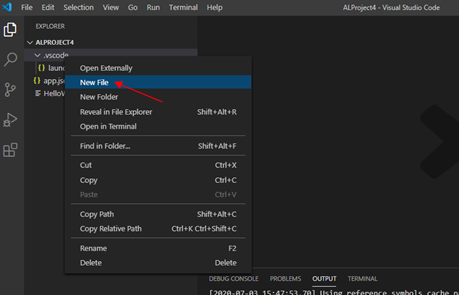
- Right Click on the .vscode and select New File.
STEP-02:
- Enter the Name of the report as shown.
- Note while naming the report, .al extension is mandatory.

Step-03:
- Type tr for creating a new report.
- ”t” is the prefix for finding the objects in VS.

STEP-04:
- After step 03, report structure has been created.

STEP-05:
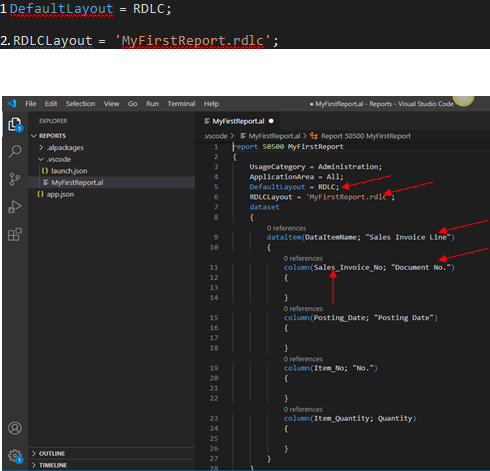
- In the above screenshot, the red underline is shown, this means that you have to specify TableName and its Fields that your business required for analysis.
- Also, note that we added syntax.
STEP-06:
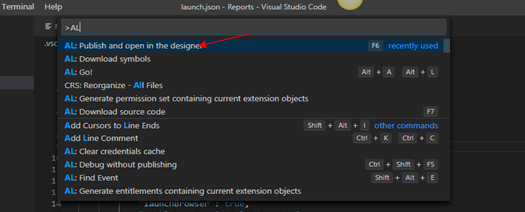
- Once the report coding is done, either go to the “Command Pallet” or use the shortcut Ctrl+Shift+P and publish the report.
STEP-07:
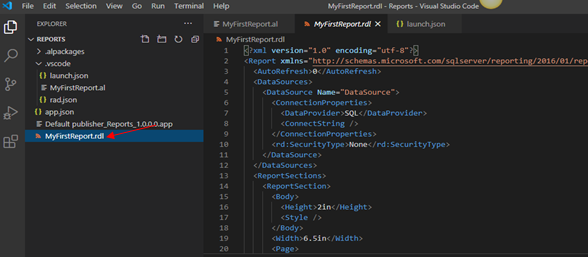
- After Publishing the report, you will see that the VS Code created one file as shown below.
STEP-08:
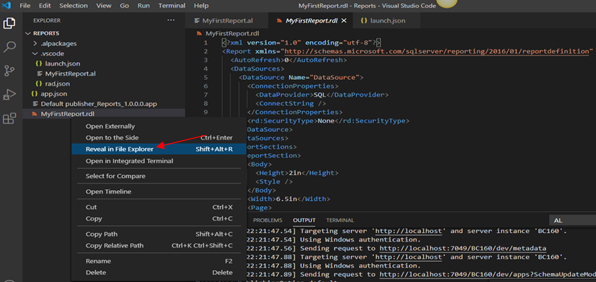
- Now Right-click on the MyFirstReport.rdl and choose the option Reveal in File Explorer.
STEP-09:
- When selecting the above option, then MyFirstReport.rdl file path open as shown below.

STEP-10:
- After Step 09, open the file in SQL Report Builder.
- If you do not have the SQL Report builder, use the below link for download.
- https://www.microsoft.com/en-us/download/details.aspx?id=53613
STEP-11:
- After installing the setup, open the file.
- The report has three section-
- Report Header
- Report Body
- Report Footer
As shown.

STEP-12:
- Now Select Report Header for Printing Report Name.

STEP-13:
- After selecting the Text Box, enter the name of the Report.

STEP-14:
- Now Select Report Body for Printing data of source table.

STEP-15:
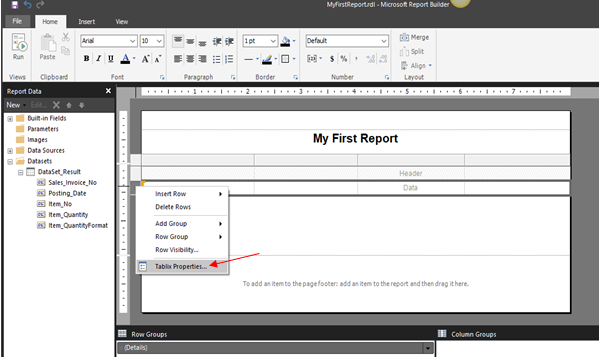
- After selecting the table, enter the data source fields that you have created in the VS Code.
- Note: Go to the Table properties and select dataset option and press “Ok”, as shown

STEP-16:
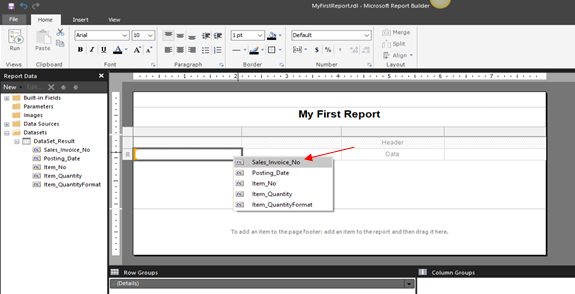
- After Step 15, select source fields from the dataset.
STEP-17:
- Enter all the source data according to the step 16.

STEP-18:
- After doing the above steps, save the report and publish a report using the VS code.


